ĐÀO TẠO DOANH NGHIỆP : SỞ KHOA HỌC CÔNG NGHỆ TỈNH ĐỒNG NAI

ENTERPRISE TRAINING: DONG NAI DEPARTMENT OF SCIENCE AND TECHNOLOGY.

HÌNH ẢNH TẬP HUẤN LỚP SHAREPOINT WORKFLOW VÀ KIẾN TRÚC SHAREPOINT

PHOTOS OF SHAREPOINT WORKFLOW AND ARCHITECTURE CLASS.

HÌNH ẢNH TẬP HUẤN LỚP SHAREPOINT WORKFLOW VÀ KIẾN TRÚC SHAREPOINT

PHOTOS OF SHAREPOINT WORKFLOW AND ARCHITECTURE CLASS.

Thursday, March 15, 2012

Integrate SharePoint 2010 with Team Foundation Server 2010


Go to Central Admin | Application Management | choose your web application (port 80) and click “Managed Paths” on ribbon
Add new path as follows
Note: don’t set “Enable anonymous access”
Open Team Foundation Server Administration Console | at “Sharepoint Web Applications” click Add
Fill full information as follows
Click verify Path button
At Extensions for Sharepoint Products | choose sharepoint web applications | click modify access
At “Restrict site create …” | input path as follows
Open visual studio | On menu Team | Connect Team Foundation Server …
Choose your exist server | click Connect
Right click Team Foundation Server | New Team Projects …
Input name then click next
Click next
Default will not create new sharepoint site
Click radio “create new sharepoint site” then click Configure…
In Relative site path delete/DefaultCollection | OK
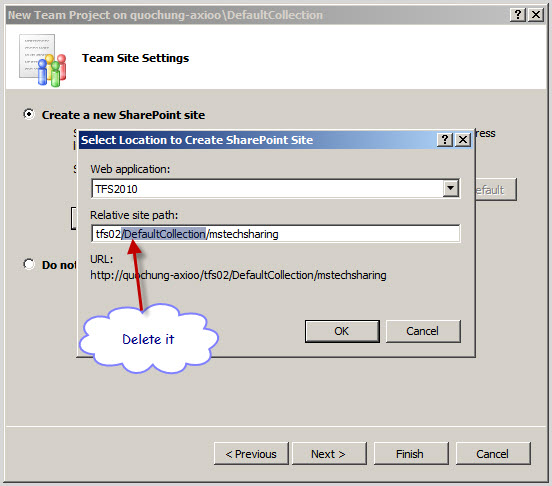
Click next
Click Next
Click Finish
Waiting some minutes for Team Project create
Team Project created
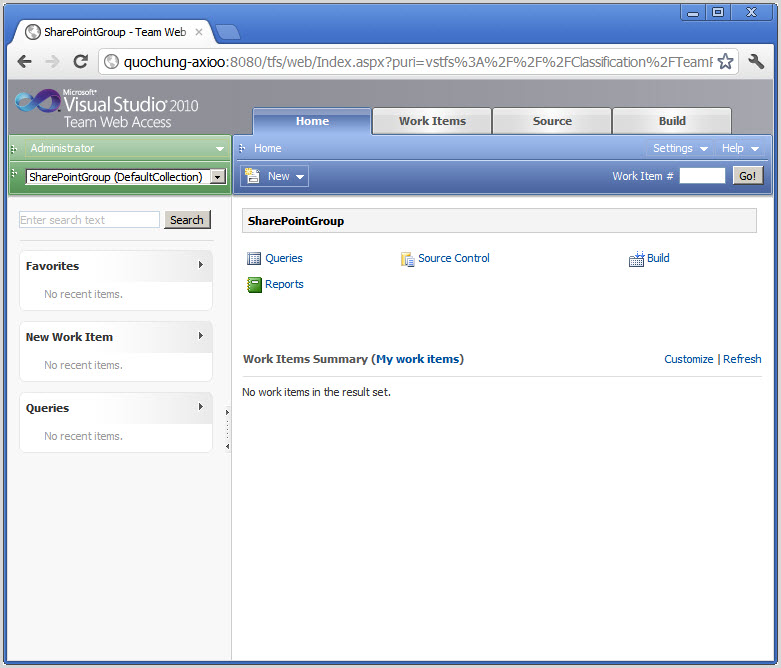
Copy link created and paste on browser
Result as follows:

How to setup and configure Team Foundation Server 2010 (TFS 2010)


Setup Team Foundation Server 2010 (TFS 2010)

Download TFS 2010 at here and setup it
Click radio “I have read …” then click Next
Check all and click Next
Waiting Installing Components
Setup Success

Configuring Team Foundation Server 2010 (TFS 2010)

After Setup Success, Click Configure
Click Start Wizard
Or you can Open Team Foundation Administration Console

On “Application Tier” click Configure Installed Features
On “Standard Single Server” click Start Wizard
Click Next
Input Account Name and Password then click Next
Click Next
If you meet error with “database  already exists …”

Solve: Go to SQL Server and delete all database as follows
Run Configuration again and met error with reporting
Solve: Go to Reporting Services Configuration Manager
On database | Click Change Database
Click “Create a new report server database” then click Next
Set default then click next
Input database name then click next
Click next
Click next
Click Finish
You see appear database already created
Click Apply
You see result as follows:
On Report Manager URL click Advanced
Input your port
Result as follows:
URLs report was created
Reboot your computer Then Configure Wizard again
Waiting Configuration Progress
Click Next
Configuration Success
Open SQL Server again and see more database
Open Visual Studio 2010 | On menu Team | Click “Connect to Team Foundation Server…”
Click to button Severs…
Enter your URL to TFS
Enter UserName and Password then click OK, you will see result as follows then click CLose
Click Connect
On server name | Right click | New team Project …
Input name
Click Next
Click Next
Click Finish
Waiting
Click Close
Result as:

Map Projects to your pc

Double click to Source Control then click to “not mapped” link
Click button “…”
Choose your folder (create new) same project name
Click Map
Click Yes
Right click your project | Add Item to folder..
Choose folder Map then click Next
Click Finish
Check in your Folder
Comment and click “Check In”  button
Waiting
Your project is checked in
Open web brower with link below and choose your team project | click Continue
Result as